
how to do a sling for arm
Feb . 14, 2025 13:31
Back to list
how to do a sling for arm
Creating a supportive and effective arm sling can be an essential skill for anyone dealing with an arm injury, whether it be a fracture, sprain, or strain. This guide will walk you through the precise steps needed to create a comfortable and secure sling using materials readily available at home. Emphasizing Experience, Expertise, Authoritativeness, and Trustworthiness, here's how to ensure the arm gets the support it needs during the recovery process
Adjust the tightness of the sling to ensure the elbow is snugly supported in the corner, and the hand is elevated slightly above the elbow. This position aids in reducing swelling and enhances comfort. Make sure the material is not intrusive or pinching the neck and adjust as necessary to prevent discomfort or circulation issues. Check for signs of poor circulation or discomfort. Make sure the skin on the fingers remains a healthy color and temperature. Encourage the person to gently open and close their hand inside the sling to maintain circulation. If discoloration or tingling occurs, adjust the sling to relieve any pressure points immediately. For increased stability, you might consider securing the elbow. Use a safety pin or clip to attach the loose corner of the cloth at the elbow to the sling. This extra step adds another layer of security, particularly beneficial during more active tasks where the arm may inadvertently shift position. Throughout the healing process, regular assessments of the sling and the injury's condition are necessary. Adjust the sling periodically to accommodate any changes in swelling or comfort levels and consult with a healthcare provider if there are any concerns about the injury or the sling's effectiveness. By following these steps, the arm sling will offer the necessary support and protection, allowing the injury to heal effectively. This method promotes both comfort and recovery, providing the best environment for the body to repair itself with minimized stress or further damage to the injured area.
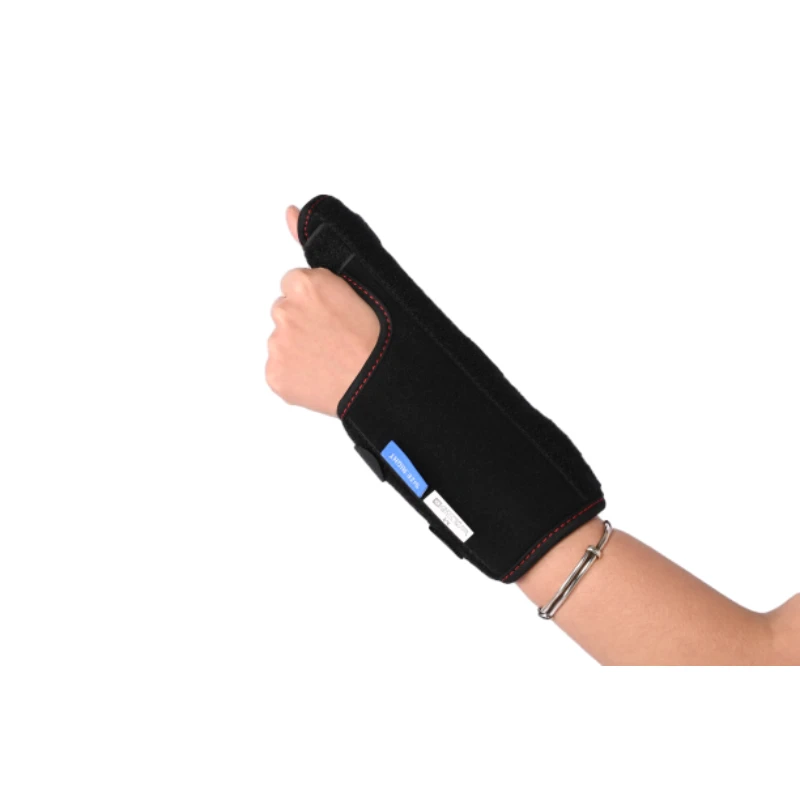
Adjust the tightness of the sling to ensure the elbow is snugly supported in the corner, and the hand is elevated slightly above the elbow. This position aids in reducing swelling and enhances comfort. Make sure the material is not intrusive or pinching the neck and adjust as necessary to prevent discomfort or circulation issues. Check for signs of poor circulation or discomfort. Make sure the skin on the fingers remains a healthy color and temperature. Encourage the person to gently open and close their hand inside the sling to maintain circulation. If discoloration or tingling occurs, adjust the sling to relieve any pressure points immediately. For increased stability, you might consider securing the elbow. Use a safety pin or clip to attach the loose corner of the cloth at the elbow to the sling. This extra step adds another layer of security, particularly beneficial during more active tasks where the arm may inadvertently shift position. Throughout the healing process, regular assessments of the sling and the injury's condition are necessary. Adjust the sling periodically to accommodate any changes in swelling or comfort levels and consult with a healthcare provider if there are any concerns about the injury or the sling's effectiveness. By following these steps, the arm sling will offer the necessary support and protection, allowing the injury to heal effectively. This method promotes both comfort and recovery, providing the best environment for the body to repair itself with minimized stress or further damage to the injured area.
Latest News
-
Best Philadelphia Collar Prices - Premium Cervical SupportNews Jul.25,2025
-
Pregnancy Belly Support Belt: Relieve Pain & Boost Comfort | ShopNews Jul.25,2025
-
Hard Cervical Collar-Hebei Jianhang Technology Co., Ltd.|Rigid Neck Support&Adjustable FitNews Jul.23,2025
-
Hard Cervical Collar-Hebei Jianhang Technology Co.,Ltd.|Neck Support&Injury RecoveryNews Jul.21,2025
-
Hard Cervical Collar-Hebei Jianhang Technology Co.,Ltd.|Neck Support&Injury RecoveryNews Jul.21,2025
-
Hard Cervical Collar-Hebei Jianhang Technology Co.,Ltd.|Neck Support&Injury RecoveryNews Jul.21,2025
No.240 Xingying West Street,Anping County,Hebei Province,China


Have a question? Keep in touch.


